
Window Treatments for Bay Windows: A Buyer’s Guide
You're probably looking at a bay window right now, thinking the same thing most homeowners think. It's one of the nicest features in the room, but it's also the hardest one to cover well.
A flat window is simple. A bay window asks you to balance privacy, light control, insulation, clearance, angles, hardware, and the overall look of the room, all at once. That's why so many bay window projects start with excitement and end with awkward gaps, clunky rods, or shades that rub every time they move.
Table of Contents
- Your Guide to Dressing a Bay Window
- Why Bay Windows Need a Special Approach
- Best Window Treatment Options for Bay Windows
- The Secrets to a Perfect Fit and Installation
- Adding Style Light and Smart Control
- Skip the Headache With a Custom Professional
- Bay Window Treatment FAQs
- Are blinds or curtains better for bay windows
- What's the best option for privacy and insulation
- Can I use one treatment across the whole bay
- Are bay windows hard to measure
- Do motorized shades make sense for a bay window
- What works in a living room versus a bedroom
- How do I keep the bay from looking too busy
Your Guide to Dressing a Bay Window
You stand in the room and the problem shows up fast. The bay window is the feature everyone notices, but once you start shopping for coverings, every small detail matters. A treatment that looks fine on a flat wall can sit awkwardly in a bay, block the seat, crowd the sofa, or leave light gaps where you did not expect them.
That is why bay windows frustrate so many homeowners. The goal is rarely just one thing. In the same opening, you may need privacy at night, glare control in the afternoon, insulation in winter, and a clean look from both inside and outside the house. Bay windows ask one treatment to do several jobs at once.
I see this often in living rooms and front sitting areas. There is usually furniture close to the window, limited clearance at the sides, and a ledge or built-in seat that people still want to use. Off-the-shelf products struggle here because bay windows are rarely uniform enough for a standard width and a simple install. Even a small difference in angle, frame depth, or projection can change what will fit and how well it will operate.
Older homes around London, Ontario add another layer. Many bay windows have been trimmed, repaired, or updated over time, so the opening may look symmetrical while measuring slightly differently from panel to panel. That is where careful planning pays off.
Bay windows reward careful planning. They punish guesswork fast.
Good bay window treatments work with the architecture instead of fighting it. The right choice depends on how the bay is built, how much mounting depth the frames give you, how often the coverings will be raised and lowered, and whether each section should operate independently or in sync.
Get those decisions right at the start, and the finished window looks intentional instead of improvised.
Why Bay Windows Need a Special Approach
You can measure the centre panel perfectly and still end up with a treatment that rubs, gaps at the corners, or sits visibly out of line. Bay windows fail on the details. The angle between panels, the depth of each frame, and the way the whole unit projects into the room all affect what will fit and how well it will work.
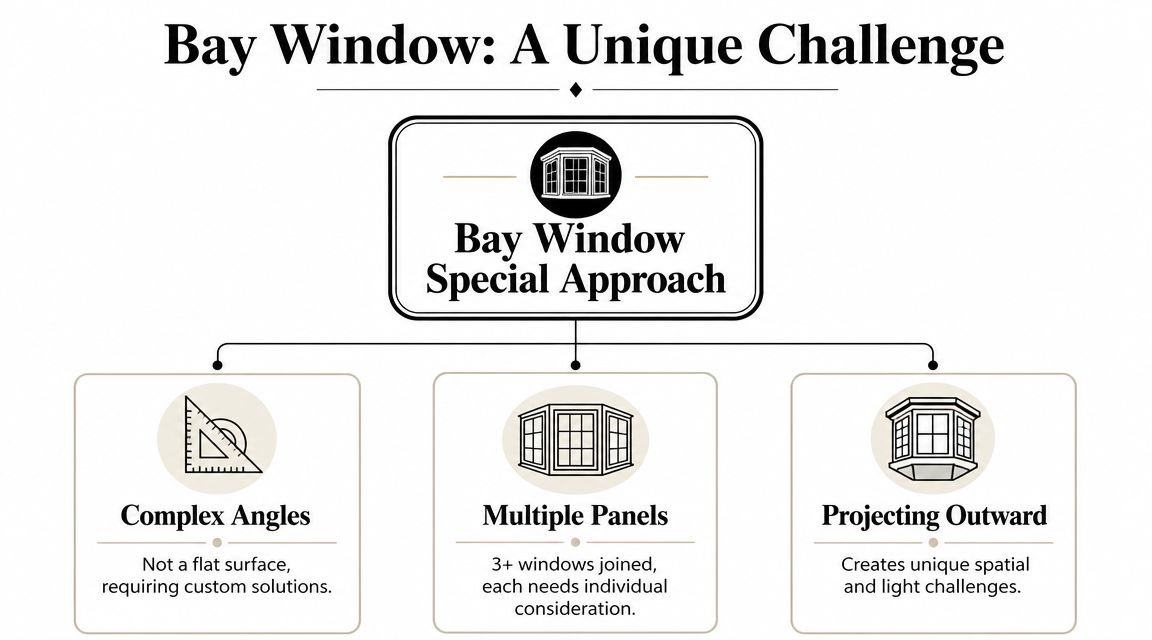
A bay window also has to read as one feature, not three separate fixes. That matters from inside the room, where uneven stack heights or crooked sightlines stand out fast, and from outside, where mismatched alignment can make an otherwise beautiful front window look improvised.
The three shapes that change everything
The layout of the bay decides the installation strategy.
- Angled bays join panels on a noticeable return. Corner clearance becomes the first priority because neighbouring treatments can clip each other during operation.
- Box bays create a squarer projection. They look simpler, but each section still needs its own measurements, especially if trim depth changes from side to side.
- Bow windows run across a gentler curve. They need hardware and fabric lines that follow that arc cleanly, without creating visual breaks from panel to panel.
The same treatment can behave very differently across those shapes. A product that works well on a box bay may feel awkward on a bow, and a setup that fits an angled bay on paper can lose too much room once brackets and stack space are added.
Why standard products fall short
Ready-made sizing rarely accounts for the small differences that cause trouble in a bay. One panel may be slightly narrower. One mullion may sit proud. One side may have less mounting depth because of trim or plaster buildup. In older homes, I often find bays that look symmetrical until the tape measure comes out.
Those small discrepancies matter. They affect whether you can inside mount, whether the treatments clear each other, and whether all sections sit at the same height. If you are considering slimmer products for a tighter opening, guides on how roller shades fit and function in real spaces can help, but bay windows still need panel-by-panel planning.
Practical rule: If you have to ignore the angles to make the treatment work, the treatment is wrong for the bay.
Space, projection, and movement
Bay windows push into the room, so operation matters as much as appearance. A treatment that looks fine in a sample book can block a window seat, crowd a radiator, or stack too far into the glass when raised.
There are always trade-offs. Slimmer treatments usually preserve the shape of the bay better, but they may allow more light at the joins. Larger treatments can give stronger coverage, but they need more clearance and can make the bay feel heavier than it should. Professional measuring solves that before anything is ordered, which is why custom installation is usually the difference between a bay window that looks polished and one that always feels slightly off.
Best Window Treatment Options for Bay Windows
A good bay window treatment has to do more than look attractive from across the room. It has to suit the angle of the bay, clear the trim, and operate cleanly on every section. That is why I rarely start with style alone. I start with how the bay is built, then match the product to the space.
Shutters for a built-in look
Shutters suit bay windows when you want a fitted, architectural result. They work especially well in period homes, front rooms, and bays where the woodwork is part of the appeal.
Their strongest advantage is day-to-day control. The louvers let you manage privacy and daylight without lifting the full panel, which is useful in street-facing bays or sitting rooms that need flexible light throughout the day.
They also wear well. The trade-off is bulk. In a shallow bay, or one with delicate mullions and limited depth, shutters can feel heavy and can crowd the glass more than a slimmer treatment.
Cellular shades for comfort and a lighter profile
Cellular shades are often the safest choice when a bay has a lot of glass and the room feels too warm in summer or cool in winter. They keep a cleaner line than many fabric treatments and usually fit individual sections well.
They also make sense in bays where you want privacy without adding much visual weight. Because the profile is slim, they tend to preserve the shape of the bay better than thicker options.
The downside is aesthetic. On their own, cellular shades can read practical rather than decorative, so they are often paired with drapery if the room needs a softer finish.
Roman shades for softness
Roman shades bring fabric, colour, and a more furnished look to a bay window. They are a strong option in dining rooms, bedrooms, and living spaces where the window should feel warm rather than strictly architectural.
They usually perform best when each window section gets its own shade. That keeps the folds aligned with the bay instead of forcing one treatment to work across changing angles.
There is a trade-off. Roman shades stack into folds at the top when raised, so they take up more glass than roller or cellular shades. In a bay with limited headroom or a view you want to keep as open as possible, that extra stack matters.
Drapery for shape and presence
Drapery gives a bay window presence. It softens hard lines, frames a window seat nicely, and can make the whole projection feel more intentional.
The method matters here. Some bays work best with separate panels on each section. Others need a bent or angled rod so the fabric follows the full shape of the bay. Both can look excellent, but only if stack-back, return space, and projection are planned properly.
Without that planning, drapery is the option most likely to crowd the bay.
Comparing Bay Window Treatment Options
| Treatment Type | Best For | Light Control | Insulation |
|---|---|---|---|
| Shutters | Built-in look, long-term durability | Strong, adjustable control | Good |
| Cellular shades | Comfort, privacy, slim profile | Strong, depending on fabric | Strong |
| Roman shades | Softness, fabric detail, decorative rooms | Good to strong | Moderate to good |
| Drapery | Layering, framing the bay, added warmth | Varies by fabric and lining | Moderate to good |
| Roller shades | Minimalist rooms and simple operation | Clean control, but side gaps can be a factor | Varies by fabric |
Roller shades are often overlooked in bay windows, but they can work very well when the recess is clean and the angles leave enough clearance for brackets and fabric drop. They suit contemporary rooms, keep sightlines open, and pair easily with drapery if you want a softer finish later. For a closer look at where they fit best, see this guide to roller shade styles, fabrics, and room-by-room use.
The best treatment for a bay window is the one that fits the geometry, works every day without rubbing or crowding, and still looks right once the room is fully in use.
The Secrets to a Perfect Fit and Installation
A bay window can look straightforward until the treatment goes up crooked, clips a handle, or leaves uneven light gaps at the corners. Those problems usually start long before installation day.
Bay window jobs are decided at the measuring stage. One wrong assumption, especially the idea that all three sections are identical, can throw off the whole order. I see this often on older homes and builder-grade bays where the angles look clean from across the room but shift enough to affect bracket placement, fabric drop, or how a shade stacks.
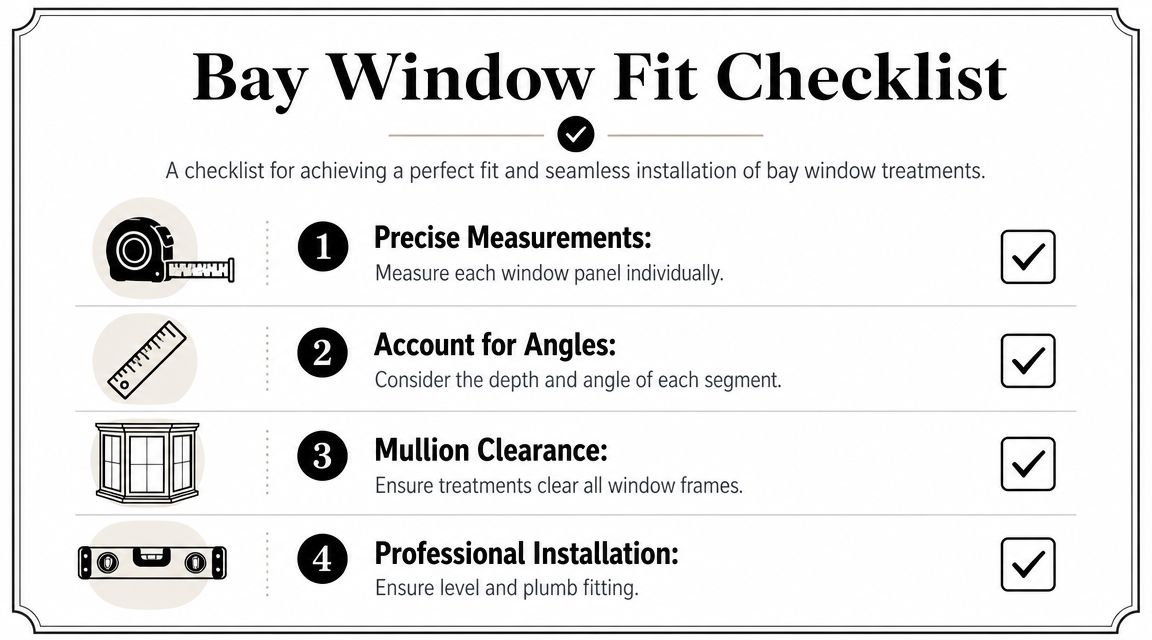
For a quick visual check of what matters most, use this fit checklist before choosing a product.
What has to be measured
Each panel needs its own width, height, depth, and angle check. Measuring one section and repeating the number across the bay is one of the fastest ways to end up with a treatment that fits on paper and fails in the room.
The details matter. A sill can run slightly out of level. One side jamb can be tighter than the other. A handle that projects only a little can still interfere with a shade or shutter frame once everything is mounted.
A proper measuring routine includes:
- Panel-by-panel width checks: Measure each section as its own opening.
- Height checks in more than one spot: Confirm whether the head and sill stay consistent across each panel.
- Angle checks: The corner angle affects bracket position, return space, and whether neighboring treatments can operate without hitting.
- Depth checks: Inside mounts need enough recess for the headrail, brackets, and full movement of the product.
- Obstruction checks: Locks, cranks, handles, and trim details can stop a treatment from lowering, tilting, or stacking properly.
Roman shades are a good example of why this matters. Fold depth, stack height, and projection all change how they behave in a tight bay. This guide to Roman shade styles and design considerations shows why they need more planning than the front view suggests.
Where DIY jobs usually go wrong
The first mistake is choosing an inside mount in a shallow recess. The treatment may technically fit, but the hardware sits proud, the fabric brushes the handles, or the finished look feels crowded.
The second mistake is treating each panel as if it exists on its own. On a bay, the corners decide a lot. Two blinds can clear perfectly within their individual openings and still collide once both are installed and operated side by side.
The third is using the same mounting plan across every bay window. Some bays need separate inside-mounted treatments for a built-in look. Others work better with outside mounts, spacer blocks, custom rods, or a combination approach because the geometry leaves no room for error.
Access is another practical issue. A deep seat, a radiator, or furniture placed in front of the bay changes what will be comfortable to use every day. That often shifts the recommendation from a good-looking option to one that is good-looking and reachable.
This video gives a useful look at installation thinking in practice.
Why installation matters as much as measuring
Accurate numbers help, but installation still decides the finish. If brackets are not level, if the projection is off, or if the centerline is slightly shifted from one panel to the next, the bay will show it immediately.
A bay window can magnify small errors. A bracket that's slightly off on a flat window becomes obvious when three panels sit side by side.
Good installers account for more than the tape measure. They check wall condition, confirm fastener placement, adjust for minor irregularities, and set each treatment so it operates cleanly from every angle in the room.
That is why professional installation pays off on angled and curved bays. The goal is not just getting the treatment on the wall. The goal is a finished result that opens smoothly, clears every obstruction, lines up across the full bay, and still looks right once the room is back in use.
Adding Style Light and Smart Control
A bay window often becomes the brightest spot in the room. That is great until afternoon sun hits one panel hard, the side windows need privacy, and the whole setup still has to look balanced from across the space.
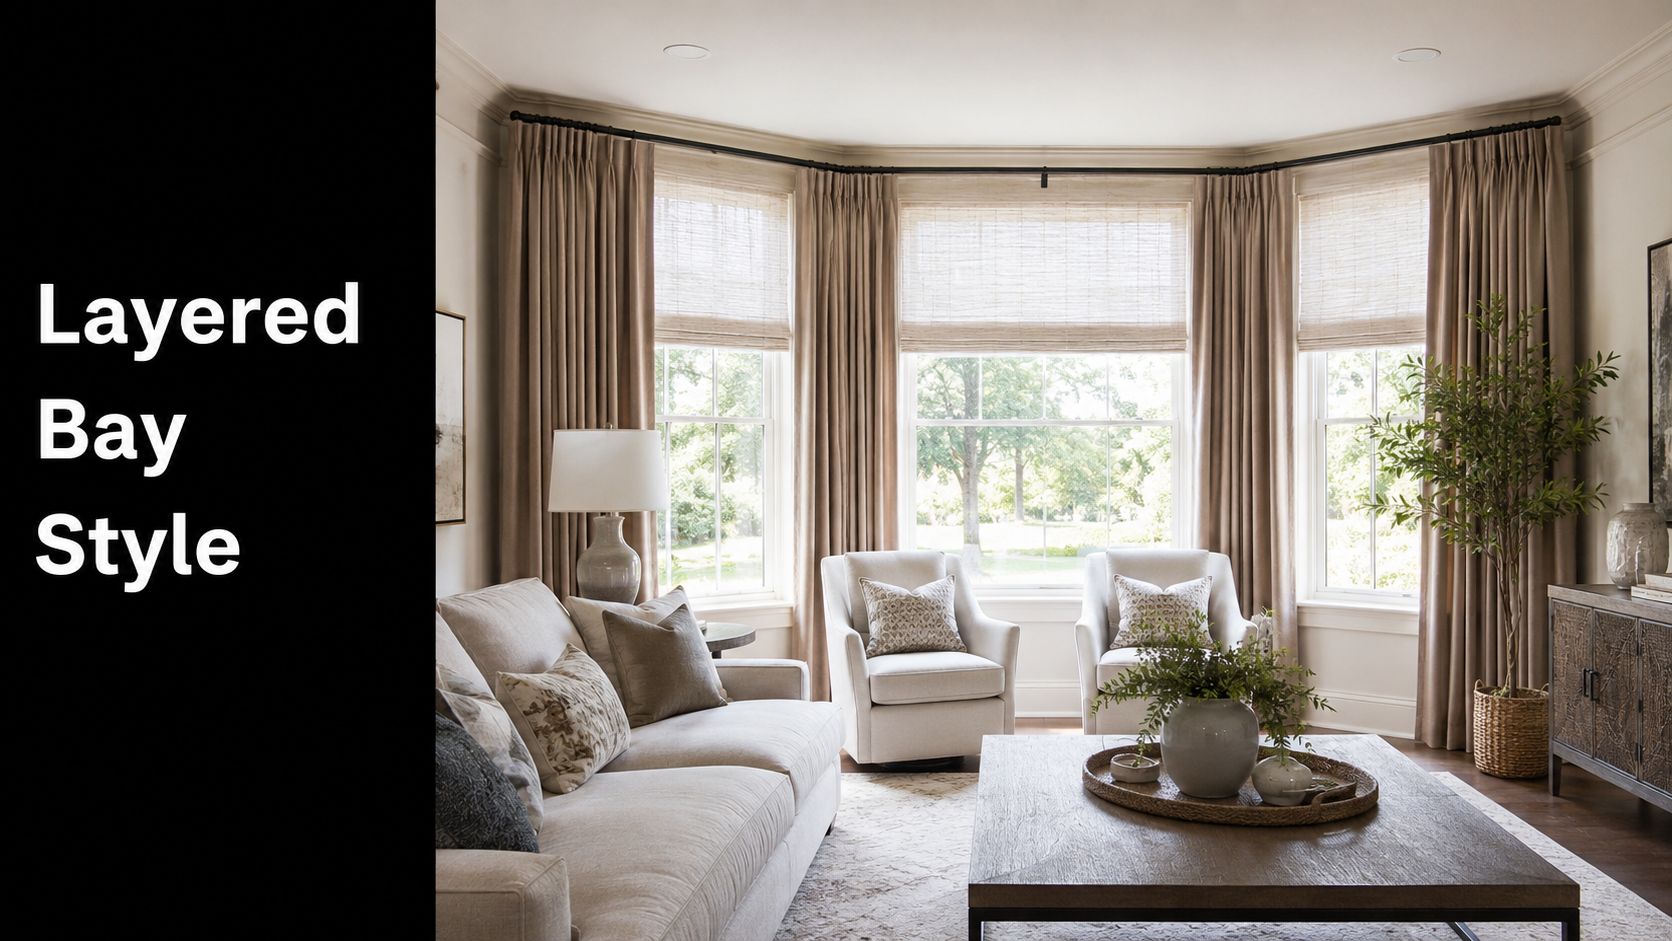
Layering without making the bay feel heavy
Layering works best when each part has a job. The shade handles privacy and light control on each window. The drapery softens the angles and helps the bay feel like one finished architectural feature instead of three separate openings.
In practice, lighter combinations usually perform better. A slim roller, woven wood shade, or Roman shade paired with stationary panels keeps the window usable and avoids the crowded look that can happen when both layers have too much bulk. Stack-back matters here too. Fabric that parks too far across the glass can steal more daylight than people expect.
Roman shades are often a strong fit if the goal is a softer look without giving up structure. The folds add warmth, but the treatment still reads cleanly panel by panel. For ideas on styles that suit different rooms, see this guide to Roman shade design ideas and applications.
The trade-off is clear. More fabric gives the bay a richer look, but it also adds visual weight and can make a shallow or narrow bay feel tighter.
Why motorization makes sense on bay windows
Motorization solves a daily-use problem on many bays. Side panels can be awkward to reach, especially with a window seat, deep sill, or furniture in front. In those cases, a manual shade may fit physically but still be frustrating to use.
Coordinated operation also improves the look of the whole bay. When shades rise to the same height and lower together, the window feels orderly. That is hard to maintain by hand, particularly on a three-panel bay where one shade always seems to stop a little higher than the others.
Smart control can be simple. A handheld remote, wall switch, or scheduled setting is often enough. The goal is not extra tech for its own sake. The goal is a bay window that manages glare, privacy, and daylight without becoming a chore to adjust.
Skip the Headache With a Custom Professional
By the time most homeowners get through the angle questions, depth checks, and mounting decisions, they realise the actual challenge isn't picking a colour. It's making every detail work together.
That's why professional service makes so much sense on bay windows. The geometry is custom, the measuring is exacting, and the installation leaves very little room for trial and error.
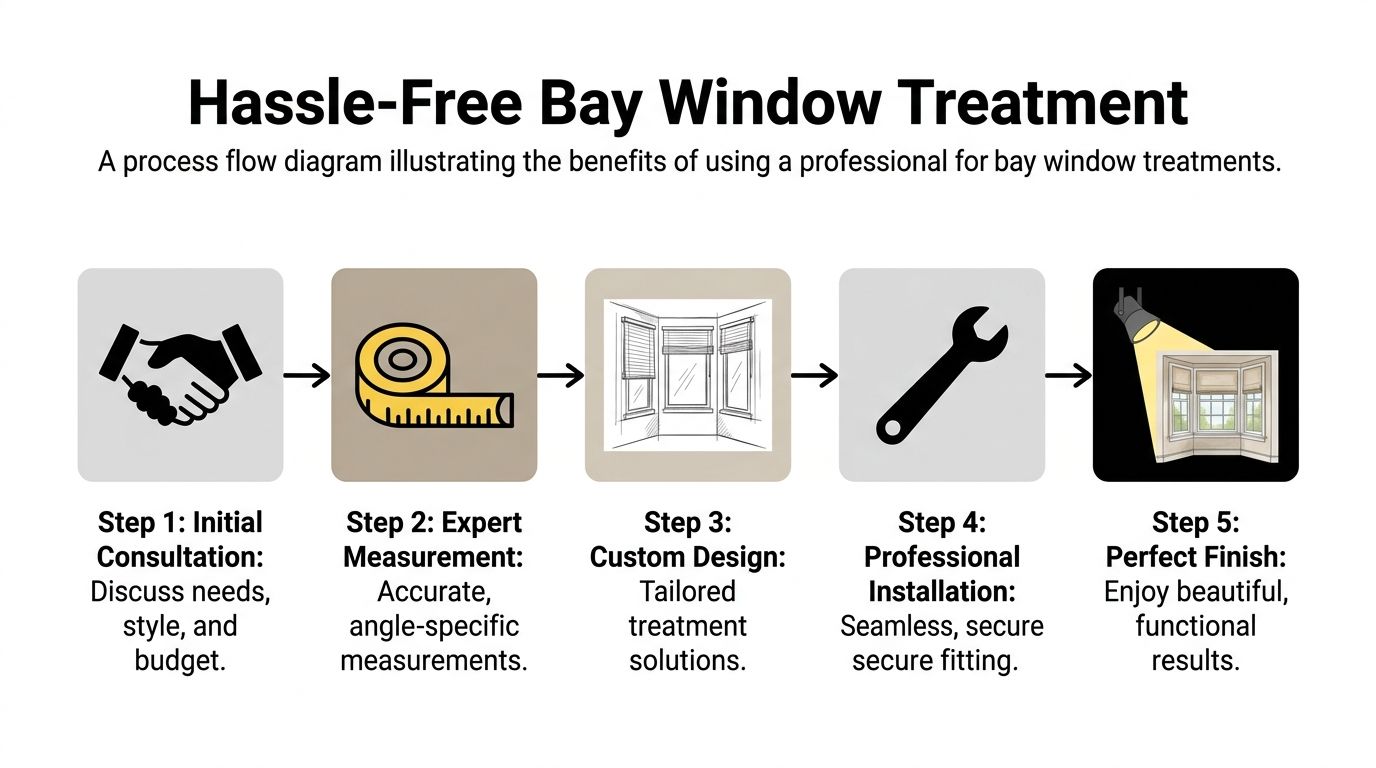
What a professional actually solves
A good specialist handles more than dimensions. They match the product to the bay's depth, projection, and use pattern.
That means they can spot issues early, such as:
- Tight recesses: Some products won't sit properly inside a shallow bay.
- Corner conflicts: Hardware placement has to account for neighbouring panels.
- Daily-use problems: A beautiful treatment that's annoying to operate won't stay open or closed the way you want.
- Visual imbalance: One panel mounted a little differently can throw off the whole bay.
In practical terms, a custom provider like Blinds Hut's custom blinds and shades service can be one option for homeowners who want panel-specific measuring, product guidance, and certified installation for complex windows.
What the process looks like
The smoothest bay window projects usually follow the same pattern.
First, the specialist looks at the room in person. Samples matter more here than they do on standard windows because the bay changes how colour, texture, and light behave.
Then they measure every section carefully, account for frame depth and hardware, and choose a mounting plan that suits the product. After manufacturing, the installer levels, aligns, and fine-tunes the finished treatment so the whole bay reads as one clean composition.
The value of professional help on a bay window isn't just convenience. It's avoiding the kind of small fit problems that stay visible every single day.
When the job is done well, the treatment feels calm and obvious, which is exactly the point.
Bay Window Treatment FAQs
Are blinds or curtains better for bay windows
Neither is automatically better. Blinds and shades usually win on precise fit and everyday control. Curtains win on softness and visual impact. In many rooms, the strongest result is a combination of both.
What's the best option for privacy and insulation
If those are the priorities, look first at cellular shades or shutters. Cellular shades are often chosen for comfort and solar control, while shutters are a strong long-term option for durable light management.
Can I use one treatment across the whole bay
Sometimes, but not always. A continuous drapery rod can work well, and some outside-mounted solutions suit the full opening. Most hard treatments perform better when each section is measured and treated individually.
Are bay windows hard to measure
Yes, compared with flat windows. The challenge isn't just width and height. It's also the angle between panels, the depth of the recess, and whether handles, locks, or trim interfere with the treatment.
Do motorized shades make sense for a bay window
Yes, especially when the side panels are awkward to reach or when you want all sections moving together. In practice, motorization often improves daily use more than people expect.
What works in a living room versus a bedroom
Living rooms often suit layered solutions that keep the bay decorative during the day. Bedrooms usually need stronger privacy and light control, so shade-based systems, often paired with drapery, are common.
How do I keep the bay from looking too busy
Use fewer materials, not more. Let the architecture do some of the work. Slim shades, restrained hardware, and well-scaled drapery usually look better than overcomplicated combinations.
If your bay window feels harder than it should, Blinds Hut can help you sort out the angles, measurements, and product choices with custom blinds, shades, and shutters made for a clean fit in real homes.