How to Install Zebra Blinds: A DIY Guide
You've got the box open, the fabric looks great, and now the hardware is spread across the floor. That's usually the moment people realise zebra blinds are simple in theory and a bit less simple once the drill comes out.
The good news is that most installation problems start before the first screw, not during the final mount. If you approach the job like an installer, with careful measuring, level bracket placement, and a quick check for window material and clearance, you can get a clean result without a lot of frustration.
Table of Contents
- Ready to Hang Your New Zebra Blinds
- Get Your Measurements and Tools Right
- Installing the Mounting Brackets
- Mounting the Blind and Final Adjustments
- Troubleshooting Common Installation Issues
- When to Choose Professional Installation
Ready to Hang Your New Zebra Blinds
Most homeowners start the same way. They unbox the blind, hold the headrail up to the window, and try to guess where everything goes.
That's not a bad instinct, but don't install by feel. Zebra blinds are more precise than basic roller shades because the sheer and solid bands need to stay aligned when the fabric moves.
A typical DIY job goes smoothly when the window opening is square, the frame material is solid, and the mount choice is clear. It gets trickier when the frame is shallow, the trim is uneven, or the blind is wide enough that even a small tilt becomes obvious.
Zebra blinds forgive very little when the headrail isn't level. You'll notice it every time you raise or lower them.
The parts usually make sense once you slow down. You'll have the blind, mounting brackets, screws, and sometimes a chain tension device or cordless mechanism depending on the model.
Before anything gets fastened, hold the brackets up to the frame and look for the practical issues homeowners often miss:
- Depth clearance: Inside mounts need enough room for the bracket and headrail to sit properly.
- Trim shape: Decorative trim can push an outside mount off level if you measure from the wrong point.
- Material strength: Wood frames are straightforward. Vinyl, aluminium, and drywall need more thought.
- Operation path: Chains, cords, and fabric all need to move freely without rubbing hardware or trim.
If the blind is going over a standard window and you're comfortable using a drill, this is a very manageable job. If the window is high, extra wide, awkwardly framed, or part of a rental where drilling may be a problem, that's where the decision shifts from DIY confidence to smart restraint.
Get Your Measurements and Tools Right
A lot of zebra blind problems start before the first screw goes in. The blind may fit the opening, but if the measurements are loose or the mount choice is wrong, you end up chasing light gaps, fabric rub, or a headrail that never looks quite straight.

Choose the mount before you measure
Start with the decision that controls every number you take. Inside mount and outside mount use different measuring logic, and each one solves a different problem.
Inside mount suits homeowners who want the blind tucked into the recess for a cleaner built-in look. It also demands more from the window. The frame needs enough depth for the brackets and headrail, and the opening needs to be measured in more than one place because few frames are perfectly square. Measure width at the top, middle, and bottom. Measure height at the left, centre, and right. Use the smallest width and the tallest height so the blind has the best chance of sitting properly without binding.
Outside mount gives you more room for error and better coverage. That is often the smarter choice when the frame is shallow, the opening is uneven, or privacy matters more than a recessed look. The goal is overlap. Extra width and height help cover the opening and reduce side light that often bothers homeowners after installation.
Practical rule: If your main complaint is light sneaking in at the edges, outside mount usually fixes that better than inside mount.
Here's the quick comparison:
| Mount type | Best when | Watch for |
|---|---|---|
| Inside mount | You want a built-in look | Depth, frame squareness, tighter fit tolerances |
| Outside mount | You want better coverage and easier fit | Trim interference, visual centring |
If you're checking a made-to-measure order before install day, this guide on how custom blinds are measured and installed helps clarify what to confirm before you open the hardware pack.
Keep the tool kit simple
A tidy install does not require specialist gear. It does require the right basics, used carefully.
Keep these within reach:
- Tape measure: Use a proper metal tape for accurate inside and outside measurements.
- Level: A short level is enough for most bracket lines.
- Pencil: Light marks are easier to remove from trim or painted frames.
- Drill and suitable bit: Match the bit to wood, masonry, metal, or uPVC.
- Screwdriver: Better for final tightening than forcing everything with the drill.
- Step stool or ladder: Stable footing keeps your marks and screw angles consistent.
The mistakes I see are usually simple. Homeowners round measurements, write down the trim size instead of the mounting area, or skip the middle measurement because the top looked close enough. On zebra blinds, small errors show up fast because the band alignment draws your eye.
Measure slowly. Write each number down immediately. Then check the mount choice one more time before you mark anything on the window.
Installing the Mounting Brackets
A zebra blind can be measured correctly and still look wrong if the brackets go up out of line. This is the stage that sets the blind's position, roll, and fabric alignment, so it pays to slow down and mark carefully.
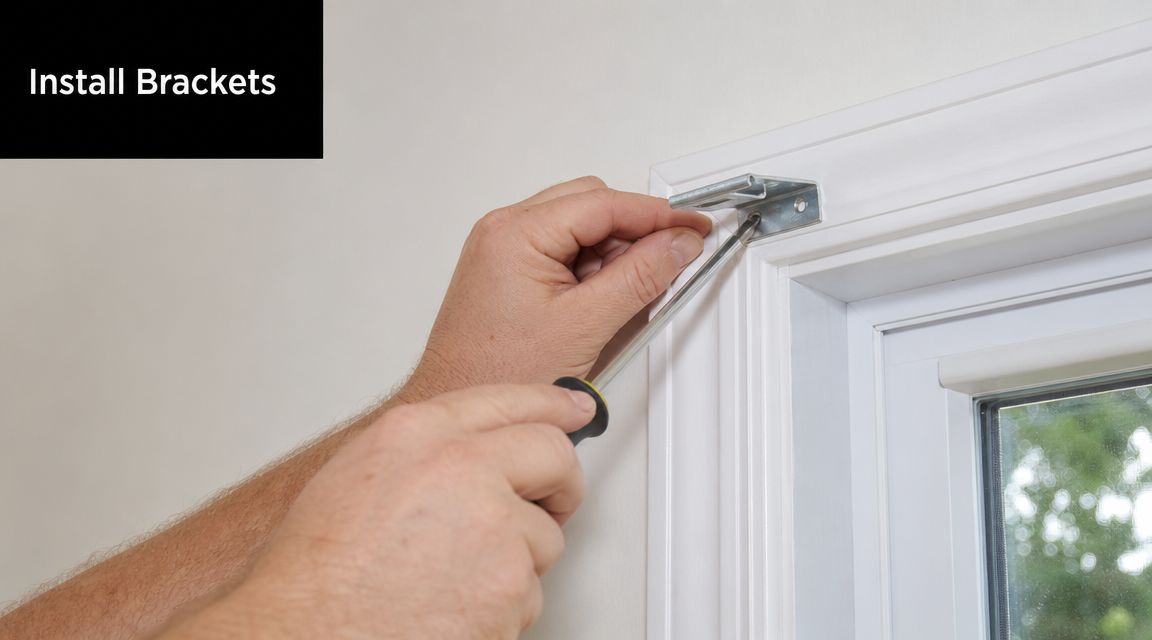
Mark the line before the holes
Hold the headrail in place first and check how it sits against the frame or wall. The goal is not just to get both brackets on. The goal is to give the headrail a straight, level base so the striped fabric tracks cleanly.
Make light pencil marks for each bracket position, then use a level to draw a faint reference line. Follow that line, not the trim. Window frames and plaster lines are often slightly off, and zebra blinds make those small errors easier to see than a plain roller blind.
Pilot holes help more than many homeowners expect. In wood, they keep screws from wandering. In harder surfaces, they reduce the chance of cracking trim or forcing the bracket out of position while you drive the screw.
One common mistake is fixing one bracket fully, then eyeing up the second bracket from it. That usually leaves a slight slope or twist in the headrail. Even a small misalignment can show up later as uneven band positioning or a blind that feels rough to operate.
A straight bracket line keeps the blind looking neat and helps the fabric layers line up the way they should.
Set bracket spacing with support in mind
Place the end brackets near each side of the headrail, following the spacing in your product instructions, and keep any centre support brackets evenly positioned on wider blinds. Dual sheer shade installation guidance also notes the importance of firm bracket engagement and proper support across the width.
That support matters for a practical reason. Zebra blinds have layered fabric and a larger headrail than a simple shade, so poor bracket placement can let the rail sag or sit under tension at one end.
Use this order for a cleaner install:
- Dry-fit each bracket: Check for handle clearance, trim interference, and enough room for the headrail to clip in.
- Mark the screw holes: Clear marks keep the bracket from drifting when you start drilling.
- Pre-drill pilot holes: Match the bit to the mounting surface.
- Fasten the end brackets first: Tighten them firmly, but stop before you strip the hole.
- Check the level again: Small shifts happen once screws bite.
- Install any centre support bracket last: Line it up with the others so the headrail does not twist.
The middle bracket is where rushed DIY installs often go wrong. If it sits slightly forward or back from the end brackets, the headrail can bind during operation. I see this most often on wider blinds, where the installer assumes the centre bracket only carries weight. It also affects alignment.
A good bracket install feels boring, and that is exactly right. Once the brackets are square, level, and secure, the rest of the job gets much easier.
Mounting the Blind and Final Adjustments
This is the satisfying part. Once the brackets are solid, the blind finally starts looking like a finished window treatment instead of a project.

Snap the headrail in properly
Lift the headrail into the brackets evenly. Most models seat best when one edge goes in first and the rail is then pressed until it clicks into place.
Don't assume it's locked just because it seems to be resting there. Give it a gentle check to confirm both sides are engaged and the rail isn't loose on one end.
If the blind resists the bracket, stop and inspect the bracket alignment. Forcing it usually bends hardware or leaves the rail only half seated.
For chain-operated models, make sure the chain path is clear before the first test. For cordless models, check that the bottom rail moves freely and returns evenly. For motorized units, follow the manufacturer's programming and limit-setting steps that came with your blind, since those details vary by system.
Test the movement before you clean up
Run the blind through a few full cycles. Watch the fabric bands as they move.
You want smooth travel, even rolling, and clean alignment between the sheer and opaque stripes. If something looks off, now is the time to fix it while your tools are still out.
This visual walkthrough can help if you want to compare your install to a live example:
A few final checks make a big difference:
- Look from across the room: Minor tilt is easier to spot at a distance.
- Test both privacy and light-filtering positions: The stripes should align cleanly in each mode.
- Listen for rubbing or clicking: Odd sounds usually point to bracket tension or a misseated rail.
- Secure any safety hardware: If your model includes a chain or cord restraint, install it properly rather than leaving it for later.
The install is done when the blind operates smoothly and looks centred, not when the screws are in. Those are two different finish lines, and the second one is the one that counts.
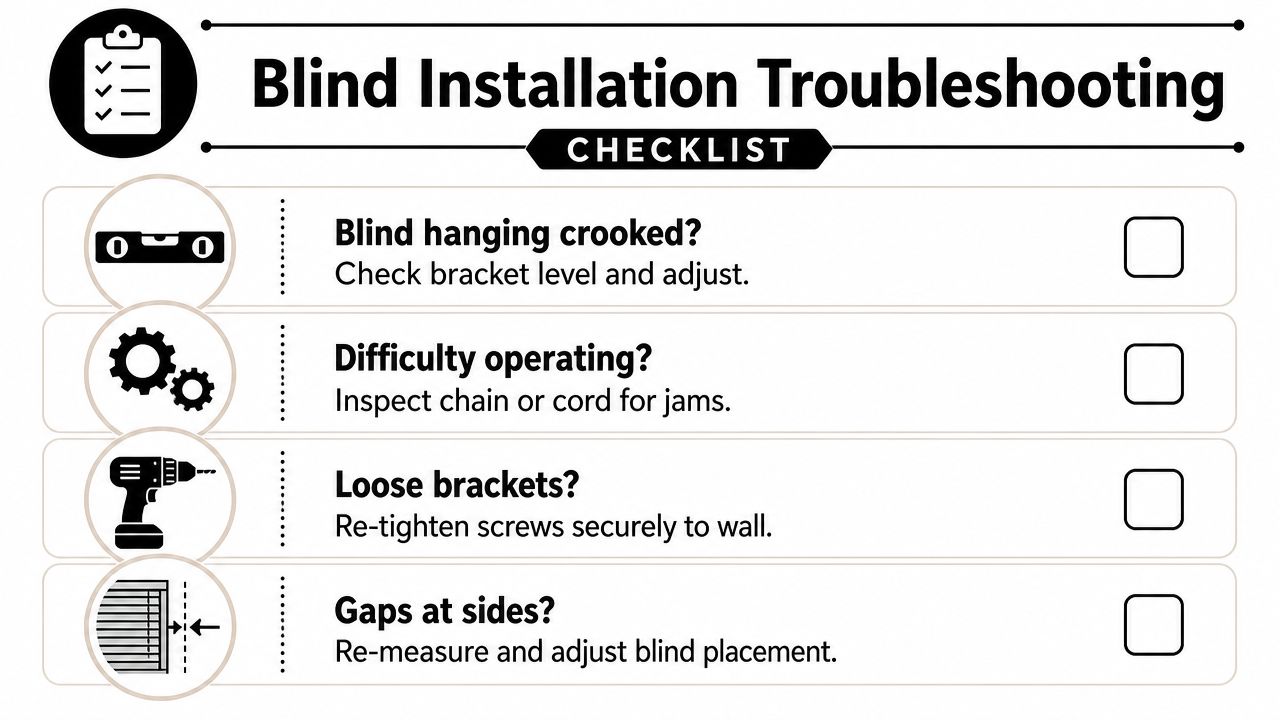
Troubleshooting Common Installation Issues
Even careful installs can need a small correction. Most problems come down to level, alignment, mounting surface, or hardware choice.
My blind hangs crooked
Cause: One bracket is slightly higher than the other, or the headrail did not seat fully.
Fix: Remove the blind, check the bracket line with a level, and inspect whether both brackets are mounted flat to the surface. If one bracket is twisted or sitting on uneven trim, the headrail will follow that angle.
The stripes do not line up cleanly
Cause: The blind is level enough to look fine at a glance, but not level enough for the fabric layers to track properly. A partially locked headrail can also cause this.
Fix: Confirm the rail is fully snapped in and cycle the blind again. If the issue remains, revisit the bracket alignment instead of trying to compensate by pulling the fabric unevenly.
A zebra blind can look “almost right” and still operate poorly. Almost level isn't level on this product.
I am renting and do not want to drill
Homeowners often want a simple yes or no, but the answer depends on the window and the blind. Many guides skip this trade-off.
Blind manufacturers note that most zebra blinds are installed with screws and pilot holes, while tension devices need to be mounted so the cord hangs freely and into a solid surface or anchors, as explained in this zebra blind installation article with safety notes.
That means no-drill options can be workable in some setups, but they aren't always the best choice for long-term stability. Vinyl and aluminium frames, rental restrictions, and child-safety hardware all affect the decision.
A practical way to consider this:
- Choose drilled installation if the blind is heavier, the window gets daily use, or you want the most secure fit.
- Be cautious with no-drill hardware if the surface is fragile, the frame is narrow, or the blind needs a tension device.
- Check your lease or building rules first if you're in a rental.
If you're comparing fit options for a rental, renovation, or tricky frame material, this page on window covering options and installation support can help you narrow down what makes sense.
When to Choose Professional Installation
DIY is a solid choice when the window is standard, the mount is straightforward, and you're comfortable measuring and drilling. It stops being the smart choice when the install has little room for error.
Call a pro if any of these sound familiar:
- The window is very high or hard to reach: Ladder work changes the job.
- The blind is large or heavy: Bigger shades are harder to hold level while fastening.
- The frame material is tricky: Vinyl, aluminium, tile, and masonry all need more care.
- The opening is not square: A pro can work around real-world construction quirks.
- You're installing multiple blinds that must align visually: One slightly off blind stands out in a row.
- The system is motorized: Programming, power planning, and clean finishing matter.
There's also the simple reality of time. Some homeowners enjoy figuring out how to install zebra blinds. Others would rather avoid remeasuring, patching holes, or standing on a step ladder for half the afternoon.
Professional installation also makes sense when the finish matters as much as the function. In living rooms, front-facing windows, offices, and full-home projects, people usually care about perfectly even lines, neat hardware placement, and a result that looks intentional from every angle.
If that sounds closer to your situation, it's worth looking at professional blinds fitting services in London, Ontario instead of treating every window like a weekend DIY experiment.
If you'd rather skip the measuring stress and get a clean, custom fit from the start, Blinds Hut can help with made-to-measure zebra blinds, in-home advice, and certified installation in London, Ontario.